Home › Blog › How AI photo restoration works
How AI photo restoration works: from GANs to diffusion
The information a scratch or sixty years of fading destroyed is gone for good, so a model that has seen millions of photographs produces a new, clean image that fits what survives of yours. This article walks through how that works, era by era, in plain language, with the research papers linked for anyone who wants the deep end.
There is no undo button
When a friend mumbles a sentence, you can usually reconstruct it because you know the language; only a few sentences fit what you heard. A damaged photo is a mumbled picture. The damage has destroyed information, and several different clean photos would all be consistent with what is left.
Everything below is a way of teaching software the language of photographs,
so it can pick a good reconstruction from the candidates. Researchers call
this an inverse problem, and the property that matters for the rest of this
article is that more than one answer always fits.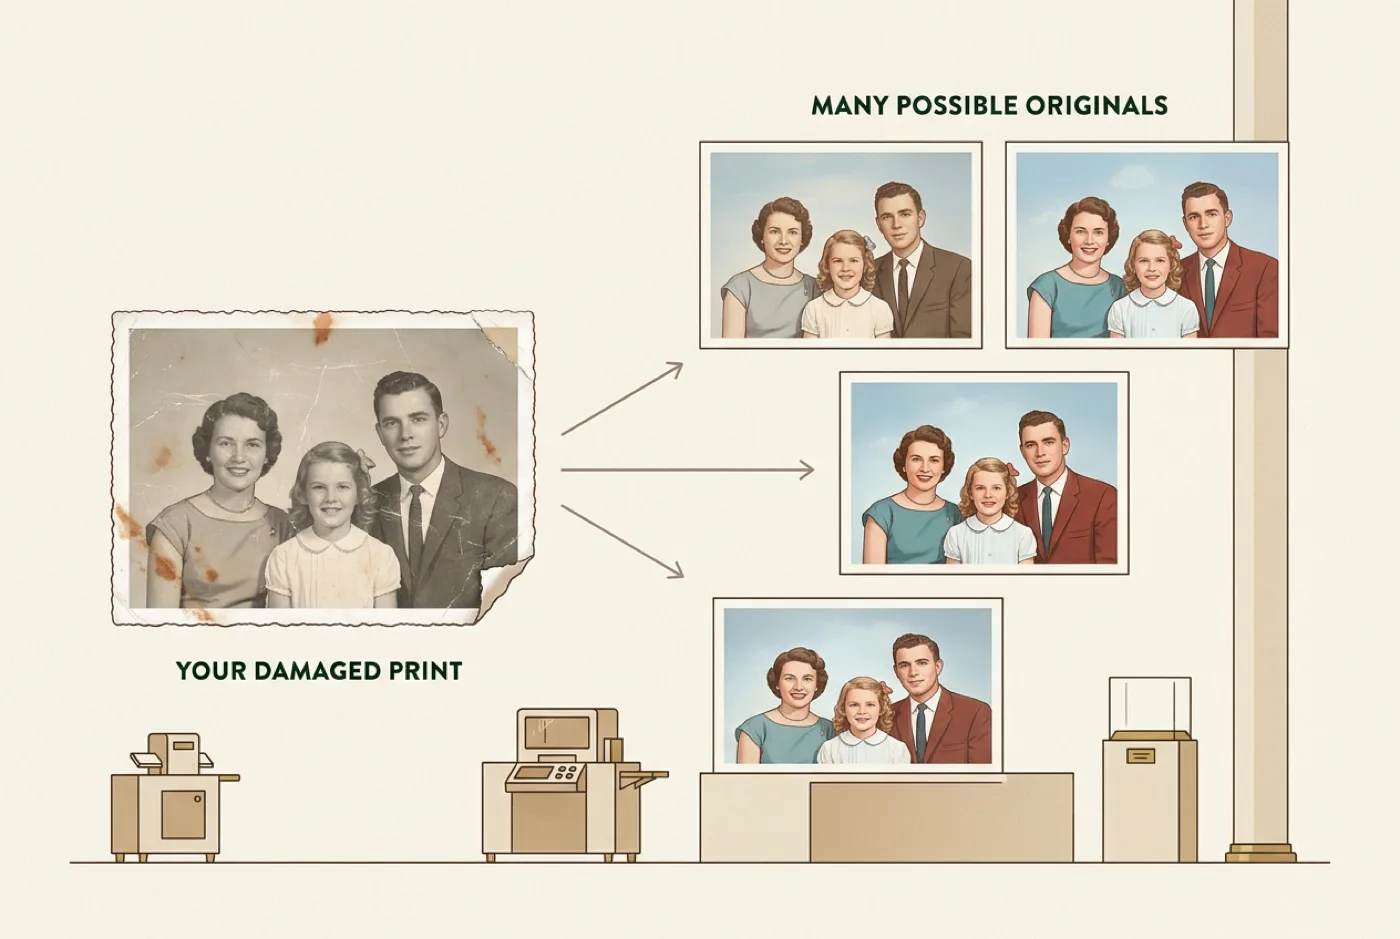
The first wave: one tool per kind of damage
From about 2016, researchers attacked each defect with its own neural network. A model could guess colors for black and white photos, a different one would rebuild faces or sharpen and enlarge, and Microsoft chained several together into the first full old-photo pipeline. Most were GANs, a 2014 invention where one network learns to produce images that another network cannot tell from real ones. It is a powerful way to make outputs look photographic.
This era worked, and tools like
DeOldify brought
it to hobbyists. But shipping a product meant running an assembly line of
models, each with its own blind spots, and stitching their outputs together.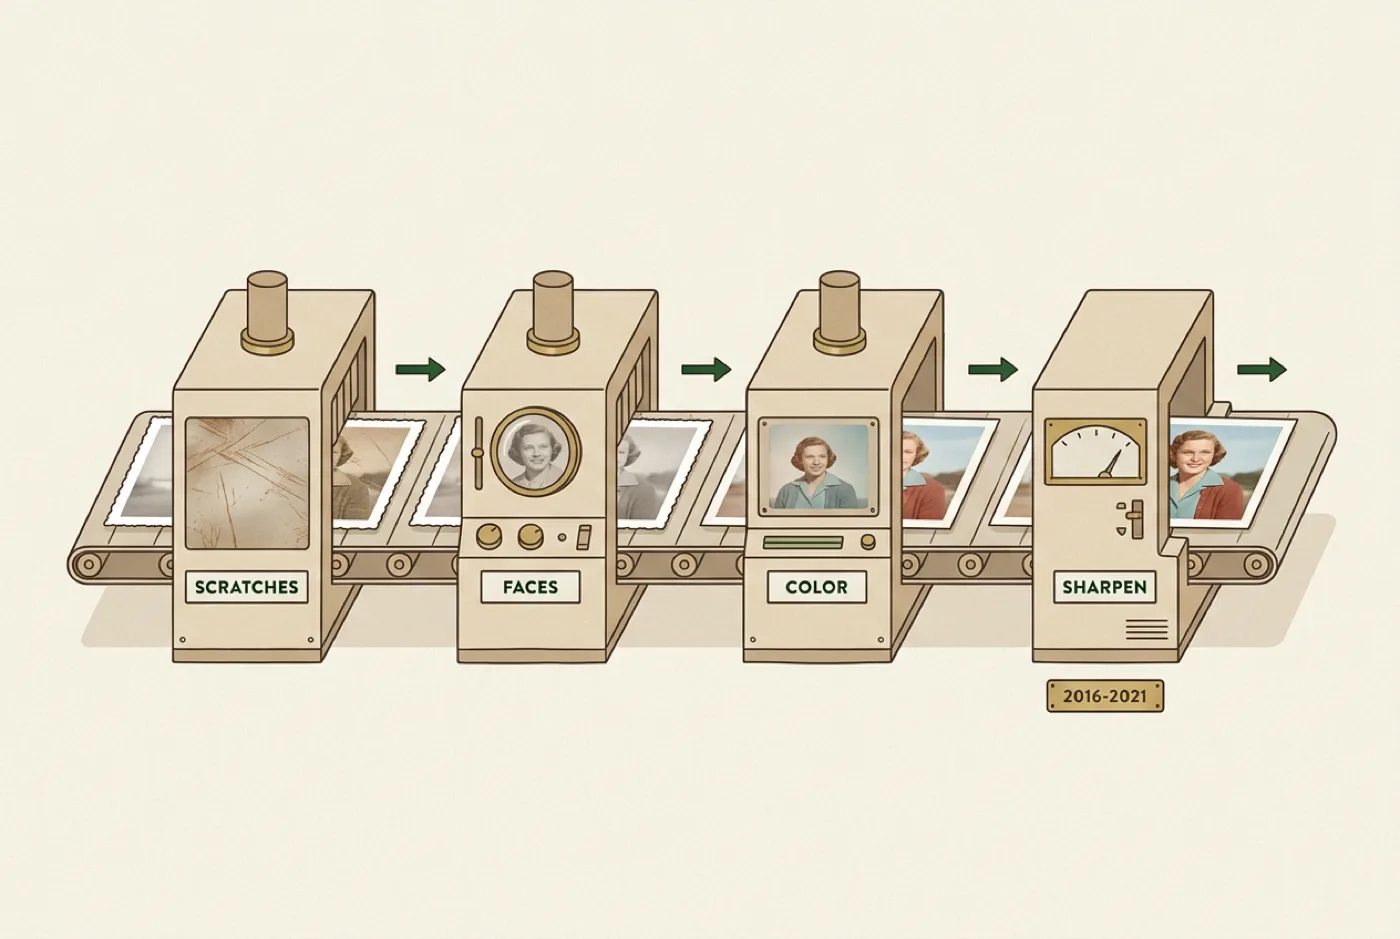
Diffusion: start from static and sharpen
In 2020, diffusion models changed the recipe. The training takes millions of real photos, buries each one in noise a little at a time until it is TV static, and teaches a network to reverse each small step. A trained model can then start from pure static and remove noise step by step until a photograph emerges. It works because the model has absorbed what photographs look like, from the symmetry of faces to the way fabric folds.
Restoration falls out almost for free. Instead of letting the model wander to
any photograph, you show it your damaged print and require every denoising step
to stay consistent with it. The model still invents, but it invents inside the
boundaries your photo sets. Google showed this for
sharpening and then
one model covering
colorization, filling holes, and more;
RePaint and
DDRM showed a
single pretrained model could fix damage types it was never specifically
trained on, which folded the whole assembly line into one machine.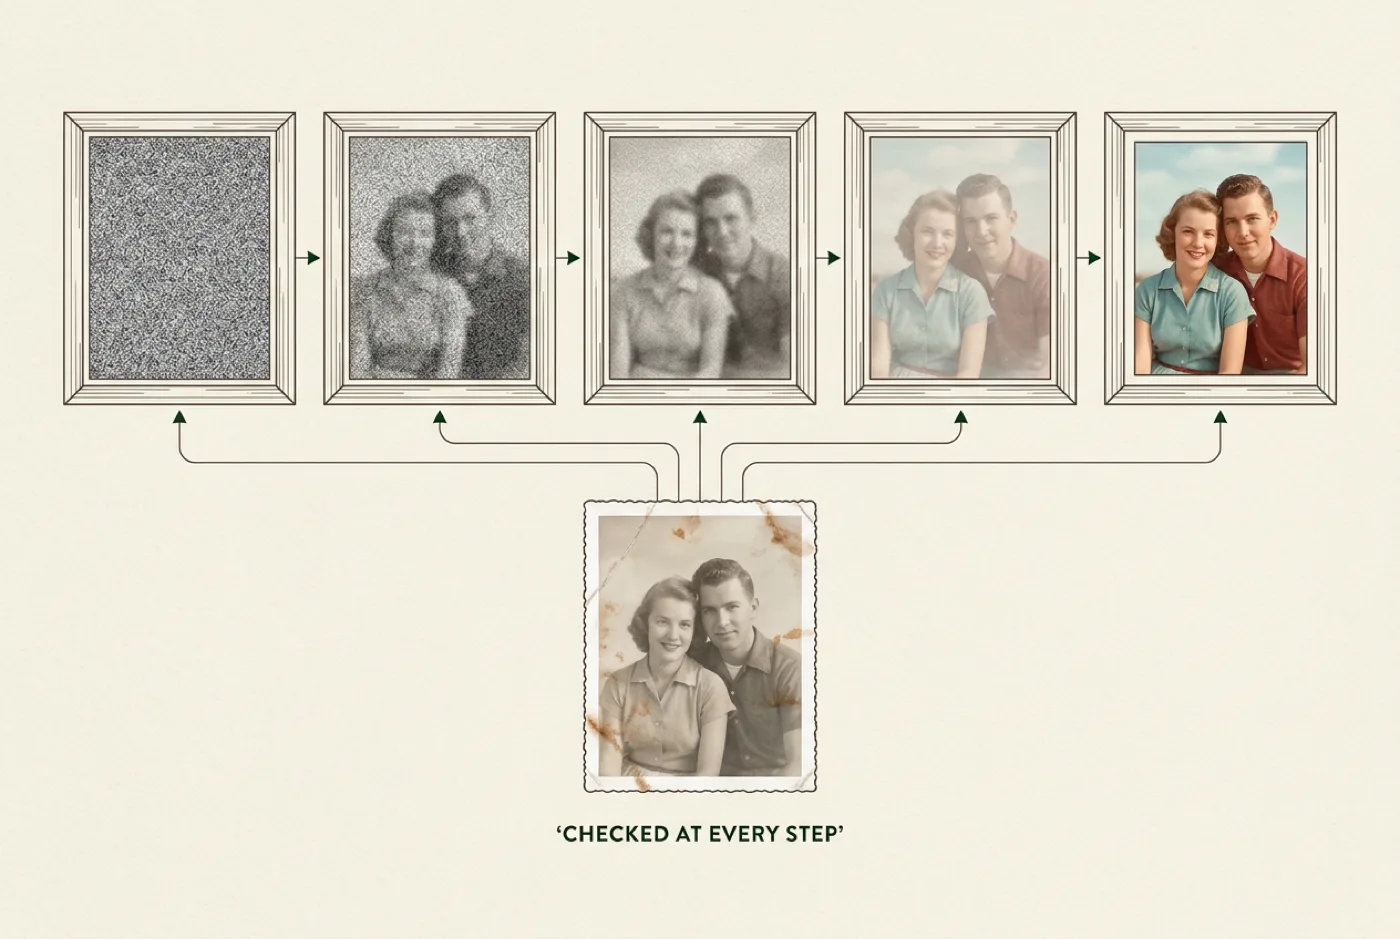
Today: you describe the fix in a sentence
Two more steps made this practical for a phone app. Latent diffusion, the idea behind Stable Diffusion, runs the whole process on a compressed sketch of the image instead of every pixel, making it roughly ten times cheaper. And a family of techniques, guidance, ControlNet, InstructPix2Pix, taught these models to follow written instructions. "Remove the scratches, restore natural color, keep the faces exactly as they are" is now a sentence a model can carry out.
That is what runs when you tap once in a modern restoration app. In PicFix, a vision model first reads your photo and writes that sentence for you, tailored to the damage it sees; a diffusion model then executes it.
Why the result is a best guess
The model picks one reconstruction out of the many that fit, like the
mumbled sentence earlier. How much that matters depends on how much was
destroyed. Light damage leaves candidates that all look nearly identical,
so the pick is safe. Heavy damage is another matter; when a face went with
the flaked emulsion, or a dress color was never recorded on black and
white film, the candidates differ from each other and the model chooses
whichever looks photographic.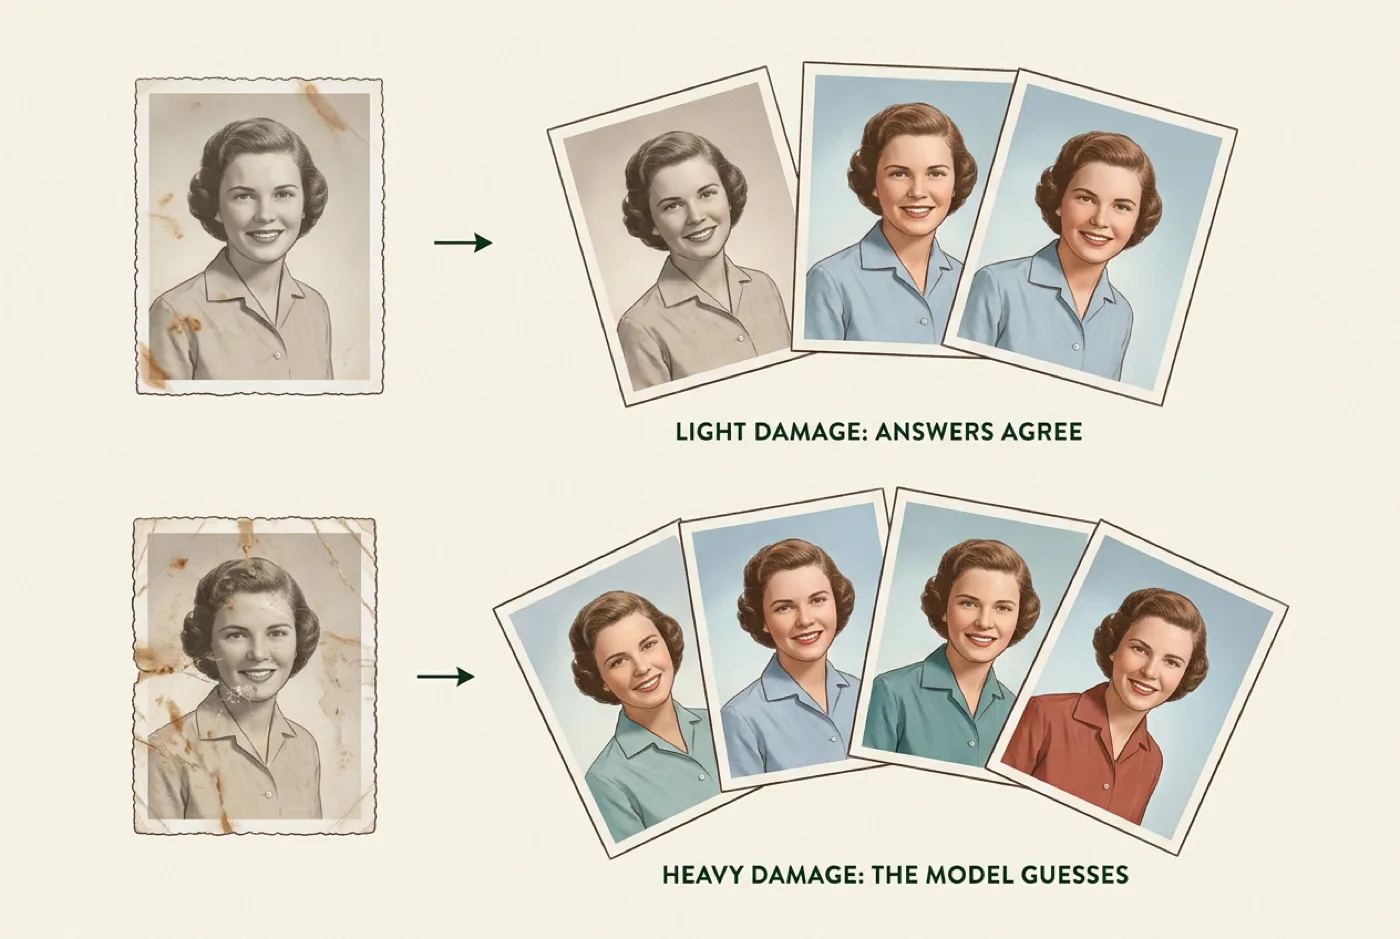
A rebuilt hedge does no harm, but a rebuilt mouth turns the face into a stranger's. An honest tool tells you where it guessed, and you keep the original file whatever happens; PicFix never overwrites it. Our methodology page shows both outcomes on real damaged photos, graded against ourselves.
Try it on a real photo
The fastest way to understand all of this is to watch it happen to one of
your own photos. It runs in the browser, with
nothing to download. No download. Photos are deleted from our servers after processing.
The paper trail
Everything above compresses a decade of research. The primary sources, in order of appearance:
- Goodfellow et al., Generative Adversarial Networks, 2014. arXiv:1406.2661
- Ronneberger et al., U-Net, 2015. arXiv:1505.04597
- Zhang et al., Colorful Image Colorization, 2016. arXiv:1603.08511
- Isola et al., pix2pix, 2017. arXiv:1611.07004
- Antic, DeOldify, 2018. github.com/jantic/DeOldify
- Wan et al., Bringing Old Photos Back to Life, 2020. arXiv:2004.09484
- Ho et al., Denoising Diffusion Probabilistic Models, 2020. arXiv:2006.11239
- Song et al., Score-Based Generative Modeling through SDEs, 2021. arXiv:2011.13456
- Wang et al., GFP-GAN, 2021. arXiv:2101.04061
- Saharia et al., SR3, 2021. arXiv:2104.07636
- Wang et al., Real-ESRGAN, 2021. arXiv:2107.10833
- Saharia et al., Palette, 2021. arXiv:2111.05826
- Rombach et al., Latent Diffusion Models, 2022. arXiv:2112.10752
- Lugmayr et al., RePaint, 2022. arXiv:2201.09865
- Kawar et al., DDRM, 2022. arXiv:2201.11793
- Zhou et al., CodeFormer, 2022. arXiv:2206.11253
- Ho and Salimans, Classifier-Free Guidance, 2022. arXiv:2207.12598
- Lipman et al., Flow Matching, 2022. arXiv:2210.02747
- Brooks et al., InstructPix2Pix, 2023. arXiv:2211.09800
- Zhang et al., ControlNet, 2023. arXiv:2302.05543